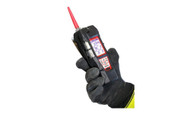
Tips for Cleaning Your Photoionization Detector
25th Jan 2024
Photoionization detectors (PIDs) measure volatile organic compounds (VOCs) and other gases in the air, providing critical data for assessing potential health and environmental risks. As with any sophisticated instrument, proper care and maintenance are vital to ensure accurate and reliable readings. Use these tips for cleaning your photoionization detector to protect the lamp lens and ensure its optimal performance.
Preparing for the Cleaning Process
Start by preparing the PID for safe and efficient cleaning. Switch off the device and disconnect it from its power source to avoid any electrical mishaps during the cleaning process.
You may purchase a PID cleaning kit or assemble your own. If you choose to make your own, you will need the following cleaning supplies:
- Polishing compound
- Latex or nitrile gloves
- Cotton swabs
- Isopropyl alcohol pads
- Dry, lint-free wipes
Be sure to wear gloves and carefully remove the lamp from the detector. The lamp is one of the most delicate parts of the PID and requires extreme care when handling.
Follow your device manufacturer’s instructions to remove the lamp and avoid damaging the equipment. Using the incorrect tools to remove the lamp may invalidate the warranty.
Cleaning the Lamp
The next tip for cleaning your photoionization detector is to clean the lamp. Contaminants on the lamp lens decrease the detector’s sensitivity. Typically, you should clean the lamp lens every 60 to 90 days, depending on how frequently you use the detector. Follow these steps to clean the lamp appropriately:
- Gently wipe the lens with the alcohol pad. Scratching the lens surface will decrease the sensor’s sensitivity.
- Dip the very tip of the cotton swab into the polishing compound. Then, apply the polish to the lens for 30 seconds using a circular motion.
- Use an alcohol pad to remove polishing compound residue from the lamp lens. Wipe the lens surface dry with the lint-free dry wipe.
Reassembling the Detector
Once you have completed the cleaning process, the next step is to reassemble your PID carefully. Before doing so, ensure the lamp lens is completely dry. Check that there are no contaminants or scratches on the lens.
Reassemble the detector by placing each part back in its appropriate position, making sure everything is securely fitted. Follow the manufacturer’s instructions to ensure proper reassembly. Double-check all the connections and fittings to guarantee accurate placement, then calibrate the detector immediately after reassembling.
Maintaining a PID requires meticulous cleaning every 60 to 90 days, particularly of the lamp lens. Gathering the appropriate cleaning supplies and following the manufacturer’s instructions for cleaning and reassembly will guarantee the best results and most efficient process. Keep a regular cleaning schedule and make it an integral part of your routine for the longevity and reliability of your PID.
Experience superior device quality and performance with TG Technical Services’ photoionization detectors for sale. Our robust devices provide accurate, reliable, and quick VOC measurements. Shop our selection today and bring unmatched efficiency to your air quality assessments.

